Yes, content writing is a creative task. But this doesn’t mean you don’t need to organize the process. Actually, without careful planning, you can even get confused.
The scariest part for a content writer often comes right at the beginning—staring at a blank page and not knowing where to start. This is exactly when a blog post outline comes to the rescue!
So now, we will share our tips on how to outline a blog post that will guide you in creating content that Google loves and ranks. Plus, you can grab our free blog post outline template and customize it later to better match your content needs.
What is a blog post outline?
A blog post outline is a document showing the structure of your article. It acts as the skeleton of the post, highlighting all the key points you should cover.
There are no strict rules on how to write an article outline or what it must include, but the main goal is to keep your content clear and well-organized.
But let’s talk more about the benefits of outlines.
Why Should You Create a Blog Post Outline?
It might seem like a small step, but having an outline can make a huge difference. Here is how it helps:
- Outlines keep writing more organized and focused
Blog post outlines help structure your articles by organizing your thoughts and insights. They show you where to start, what to say, and how to end. The result? Clear, easy-to-follow content that keeps readers engaged from start to finish.
- They help to overcome writer’s block
Every writer faces this challenge at some point in their career. But with a blog post outline, you don’t have to stare at a blank page wondering where to begin. Instead of starting from scratch, you simply follow the outline while writing a blog.
- A blog outline ensures your headings and subheadings are relevant
Your content should be concise and to the point, and adding relevant heading tags to your outline is the first step. They also ensure you cover all key points and important ideas without leaving anything out.
- They create a clear and logical flow
Ensuring that each blog section flows logically makes content easier to follow and boosts the overall reading experience. Thanks to outlines, most probably you won’t go off topic and add unnecessary information.
- Outlines save time
Time is valuable for writers with many tasks. A blog outline saves time, letting them focus on the creative and challenging parts of writing.
Long story short, the writing process becomes more efficient thanks to a clear blog post outline.
How We Outline Blog Posts in Just 3 Easy Steps
Let’s explore some time-saving steps from our content team that can simplify your blog outlining process.
Choose a Topic and Do Some Research
Instead of copying what other top-ranking blogs say, we do things differently. We want our content to reflect what we actually know and do, so we showcase our team’s real experience and insights.
Once we pick a topic, we don’t just Google it. We talk to our teammates who deal with it every day. For example, if we’re writing about link building outreach, we’ll talk to our link builders and data experts to hear how it actually works.
Before the interview, we make a list of questions to ask so we can collect only the most essential information.
When it’s time for the interview, we grab a laptop or just a pen and paper—whatever feels right. While interviewing them, we start seeing the structure of the blog post. That’s how the outline forms—based on real stories and tips from the team.
Turn Team Insights Into a Clear Outline
We’ve collected a lot of information from the team, and now it’s time to turn all of this into a clear blog post outline. Here’s how to do it.
Let’s get back to our example again about the article on link building outreach. During the interview, we may end up with lots of potential headings, like “What is Link Building Outreach?”, “How to Do Link Building Outreach,” and “Best Tools for Link Building Outreach.”
So, now creating an article seems much easier, right?
Review the Outline With an SEO Specialist
Once the blog post outline is ready, we go over it with our SEO manager. The goal isn’t to limit creativity—it’s to make sure the content is easy to find and ranks well.
SEO specialists also offer both primary and secondary keyword recommendations and help in optimizing headings and subheadings as naturally as possible. This is an important step because Google largely “understands” your content through its headings. Plus, creating blog titles that are catchy and include relevant keywords can help your content reach more people.
Finally, after creating an SEO content outline, move on to the most exciting part—writing your first draft.
2 Handy Tools to Help You Plan Better Blog Posts
We’ve shared how we build our blog post outlines, but if you’re new to content writing, we’ve also got a few tools you might want to check out. We don’t personally use them, but they can be helpful when you’re just getting started.
Ahrefs’ AI Content Helper
Ahrefs has recently released a new content optimization tool called AI Content Helper. While it’s designed mainly for optimizing content for SEO, we’ve discovered it’s also great for creating content outlines. Here’s how:
Step 1: Sign in to your Ahrefs account and click on AI Content Helper in the upper bar menu
Step 2: Add your target keyword (e.g., blog post outline) and choose the search intent you want to optimize for
Step 3: Learn your competitors’ headings structure to create your outline and organize your thoughts in a more logical way.
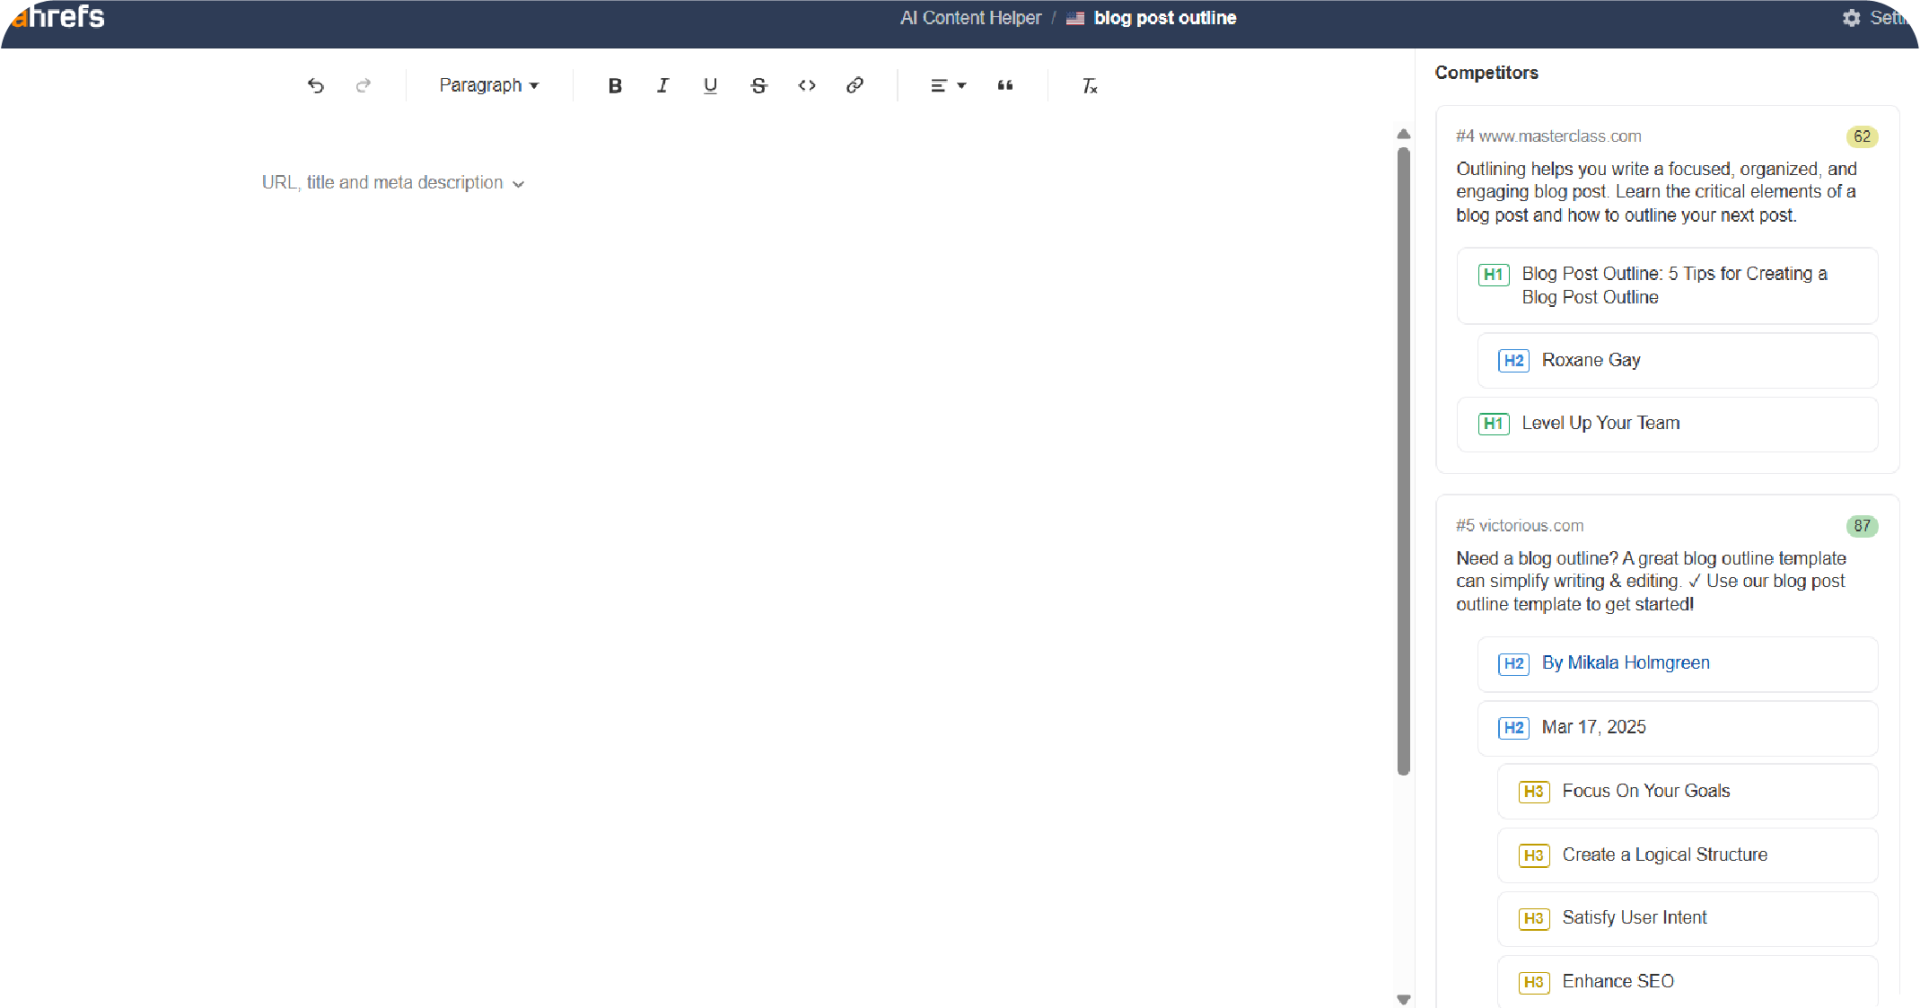
Step 4: Insert all the necessary headings into a doc and make some modifications later.

Note: We don’t recommend copying and pasting every single heading into your outline. Instead, use this method when you’re stuck for ideas or want to identify content gaps with your competitors.
ChatGPT
Let’s speak about AI content creation tools as well. Of course, ChatGPT can be helpful, especially for newbie content writers who are learning how to write a blog post outline.
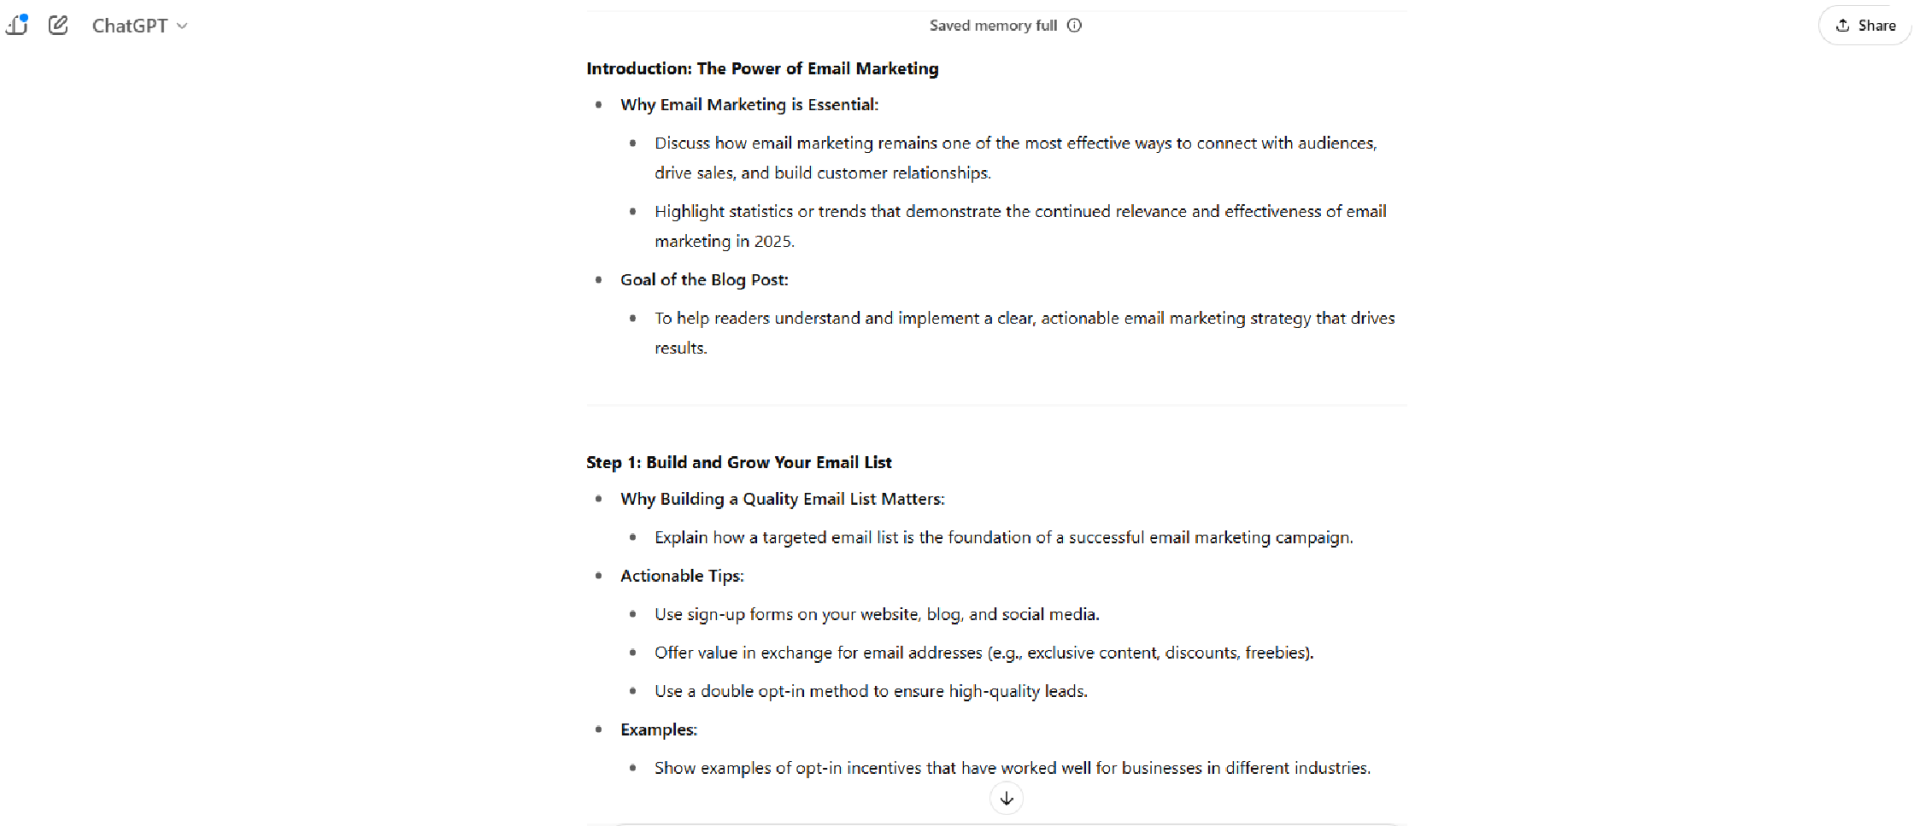
To get a good outline from ChatGPT, it’s important to start with a clear and detailed prompt. The tool will then generate a structure you can use as a starting point.
Here is a good prompt example you can use:
“Create a detailed blog post outline on [insert the topic] in a how-to format. Break it into clear, actionable steps that readers can follow easily. Include:
Introduction: Explain the significance of discussing the topic.
Step 1: Provide the first step in the process with a clear explanation and tips.
Step 2-4: Continue with additional steps, offering expert advice and examples.
Conclusion: Summarize the steps and emphasize the key takeaway.
Bonus Tip: Add an optional section for additional resources or tools.“
As you can see in the screenshot below, it’s generated an outline, but you can always do some tweaks to make it better and ensure it better meets your needs.
To Wrap Up
All writers have two main goals: create content that both readers and Google appreciate. A blog post outline is the first step to reaching those objectives. They make the writing process more effective and save time.
We’ve shared tactics on how we create outlines and hope they help you create unique, SEO-friendly content, but if you don’t want to go through the trial-and-error process, you can simply outsource content creation to us. Book a call to see how we can help with your content strategy!
FAQs About Blog Post Outline
What is a blog post format?
A blog post format is the structure used to organize content, including a title, introduction, body with headings, and a conclusion.
What should be included in a blog post?
A blog post should include a title, introduction, main body with clear headings, relevant images and links, and a conclusion or call to action.
What is a blog post schema?
A blog post schema is structured data that helps Google better understand your content and display information like the title, image, and date in search results.


